A Sweet Treat Loved by All
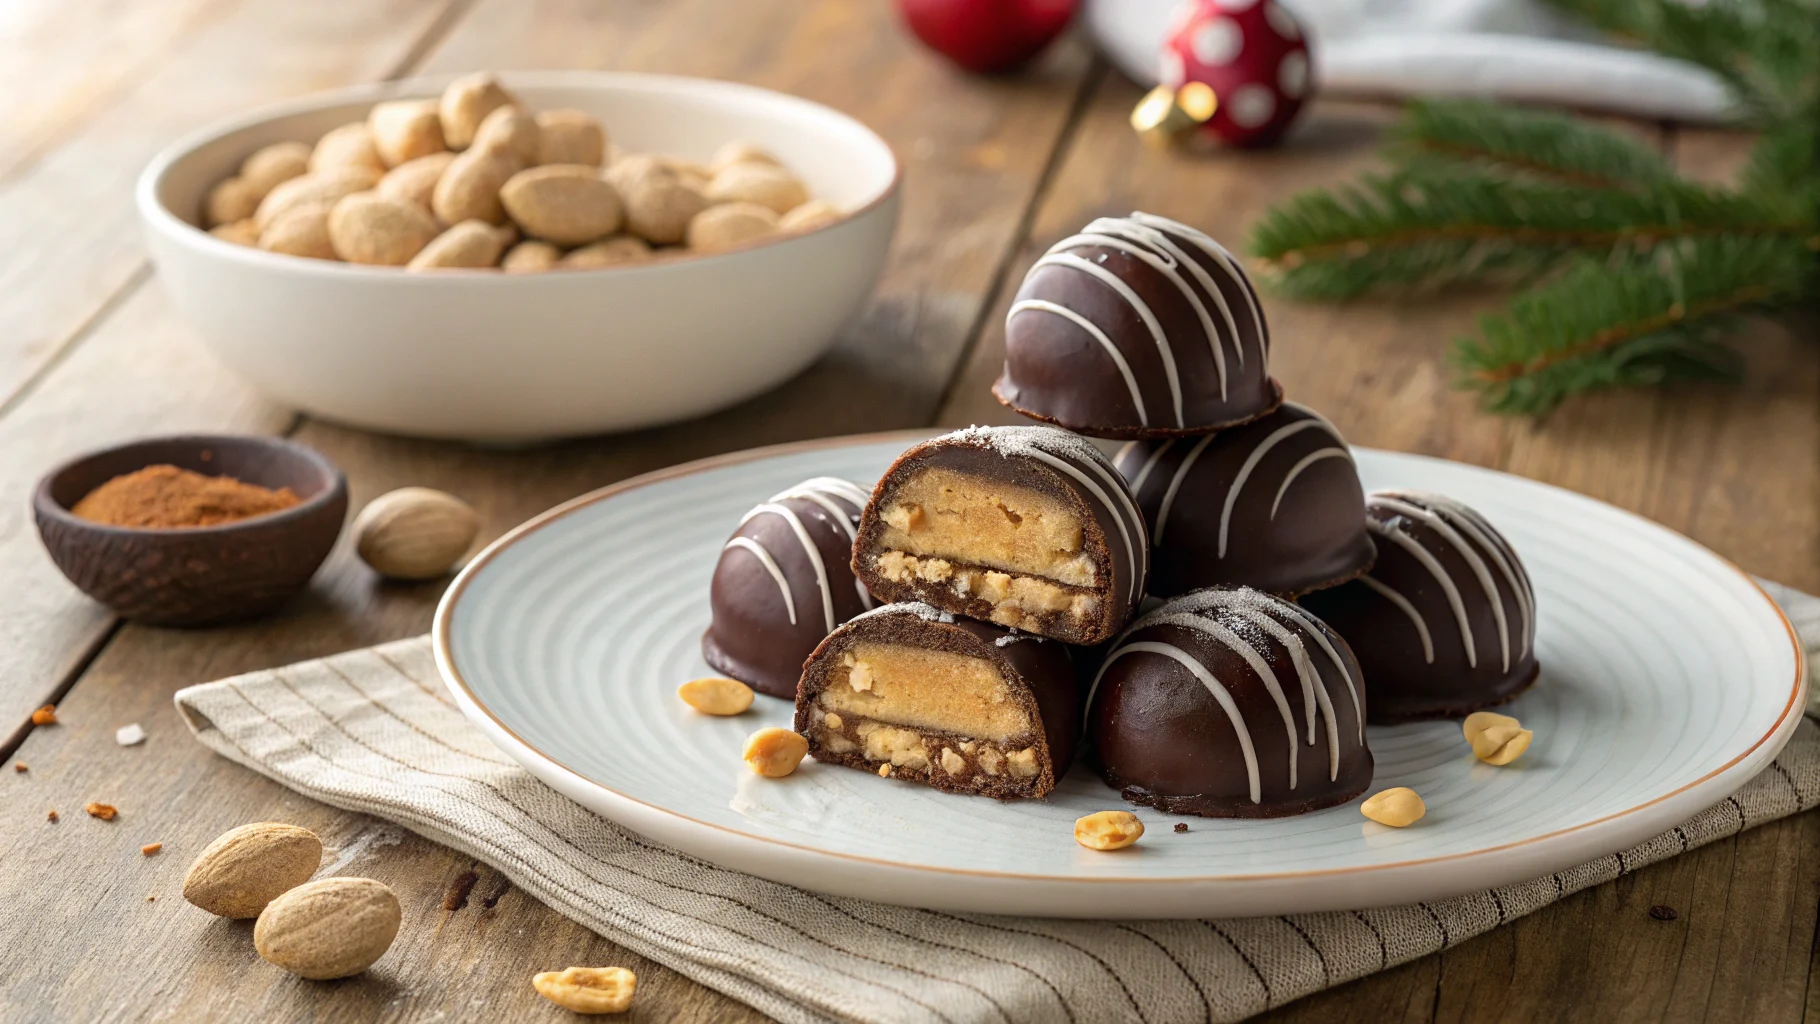
Peanut butter balls are the kind of dessert that screams nostalgia, don’t you think? They’ve been a holiday favorite for decades, gracing cookie trays and dessert tables during Christmas, Thanksgiving, and even casual get-togethers. First popularized in the mid-20th century as a simple no-bake treat, peanut butter balls have evolved into a symbol of homemade goodness.
The original recipe was often passed down through families, scribbled on recipe cards with notes like “Mom’s favorite” or “add extra chocolate.” Over time, creative home bakers started customizing them with new flavors, coatings, and even dietary tweaks. But at their core, peanut butter balls are about simplicity: just a few pantry staples rolled into a decadent bite-sized dessert.
Whether you call them buckeyes (if you leave the top peanut butter exposed) or just good old-fashioned peanut butter balls, one thing’s for sure—they’re universally loved.
Why Make Peanut Butter Balls at Home?
Let’s be honest, store-bought treats are fine in a pinch, but nothing beats homemade. When you make peanut butter balls at home, you control everything—from the quality of the ingredients to the sweetness level and even the size of each ball (tiny bites or hefty snacks, your call!).
Plus, they’re incredibly easy to whip up, no fancy equipment or advanced skills needed. You can make them in under an hour, and they’re perfect for involving kids—because, let’s face it, rolling peanut butter into little balls is oddly satisfying.
Another perk? Customization! You can jazz them up with crushed nuts, drizzle them with white chocolate, or even add sprinkles for a festive touch. Homemade peanut butter balls also store well, so you can prepare them ahead of time for parties or gift them as edible presents.
So, why settle for pre-made when you can make peanut butter balls at home that taste better and feel more personal? Trust me, once you start, it’ll become a yearly tradition.
Essential Ingredients and Tools for Perfect Peanut Butter Balls Alltimecooking
To make peanut butter balls that taste amazing and have the perfect texture, you’ll need a few key ingredients and some basic kitchen tools. Let’s break it all down so you’re set up for success.
Key Ingredients for Peanut Butter Balls Alltimecooking
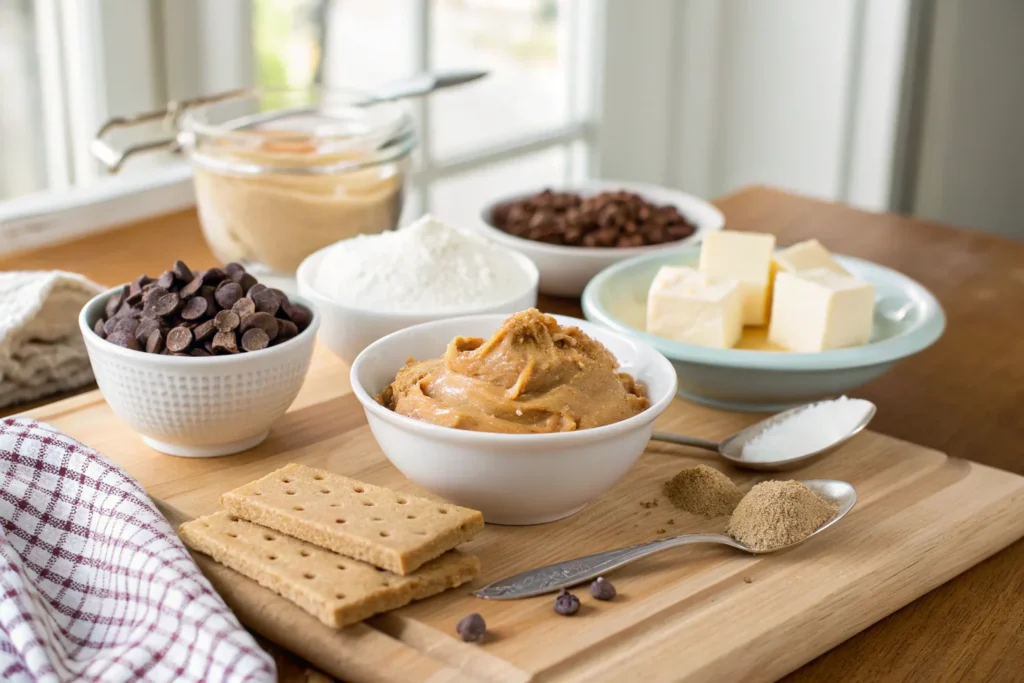
The magic of peanut butter balls lies in their simplicity. Here’s what you’ll need:
Creamy for the Best Peanut Butter Balls Alltimecooking
The star ingredient! For the best texture, use creamy, no-stir peanut butter. Brands like Jif or Skippy work perfectly because they’re smooth and hold their consistency. Natural peanut butter with oil separation can make the mixture too runny.
Powdered Sugar for Sweetness and Structure
Most recipes call for powdered sugar, which helps bind the mixture and adds sweetness. Powdered sugar dissolves easily, giving your peanut butter balls a smooth, melt-in-your-mouth texture.
- Want less sweetness? Reduce the powdered sugar slightly and add crushed rice cereal or graham crackers to maintain the firmness.
Binders and Fillers
For extra crunch and structure, consider mixing in rice cereal, graham cracker crumbs, or even crushed pretzels. These ingredients add texture while helping the mixture hold together.
Chocolate Coating for Peanut Butter Truffles
A good chocolate coating takes your peanut butter balls to the next level. Here are a few options:
- Semi-Sweet Chocolate Chips: Classic and easy to melt.
- Milk Chocolate: Sweeter and creamier—great for kids’ versions.
- Dark Chocolate: Perfect if you prefer a more intense, less sweet coating.
- White Chocolate: For a decorative drizzle or a unique twist.
Melt your chocolate with a teaspoon of coconut oil or shortening to make it smoother and easier to coat.
Recommended Equipment for Making No-Bake Peanut Butter Balls Alltimecooking
Having the right tools makes the process smoother and more enjoyable. Here’s what you’ll need:
- Mixing Bowls: A large bowl for combining the ingredients and a smaller bowl for melting chocolate.
- Measuring Cups and Spoons: Essential for precise ingredient ratios.
- Baking Sheets: Use parchment-lined baking sheets to hold the balls during chilling and after coating.
- Cookie Scoop: A small cookie scoop ensures evenly sized peanut butter balls. If you don’t have one, a teaspoon works too.
- Dipping Tools: Forks, toothpicks, or specialized dipping tools are perfect for coating the balls in chocolate.
- Microwave-Safe Bowl or Double Boiler: For melting chocolate without burning it.
Step-by-Step Recipe Instructions for Peanut Butter Balls Alltimecooking
Ready to make some peanut butter magic? Let’s walk through each step so your peanut butter balls turn out perfect every time.
Preparing the Peanut Butter Mixture
Start by gathering all your ingredients. In a large mixing bowl, combine 1 cup of creamy peanut butter (make sure it’s the no-stir kind for the right texture), 2 cups of powdered sugar, and 1/2 cup of softened unsalted butter. For added crunch, stir in 1 cup of crushed rice cereal if you’d like (optional but highly recommended!).
Using a wooden spoon or a hand mixer, blend everything together until you get a smooth, cohesive mixture. The dough should be thick enough to hold its shape but still easy to scoop. If it feels too sticky, add a little more powdered sugar, 1 tablespoon at a time, until you get the right consistency. On the flip side, if it feels too dry, a teaspoon of milk can work wonders.
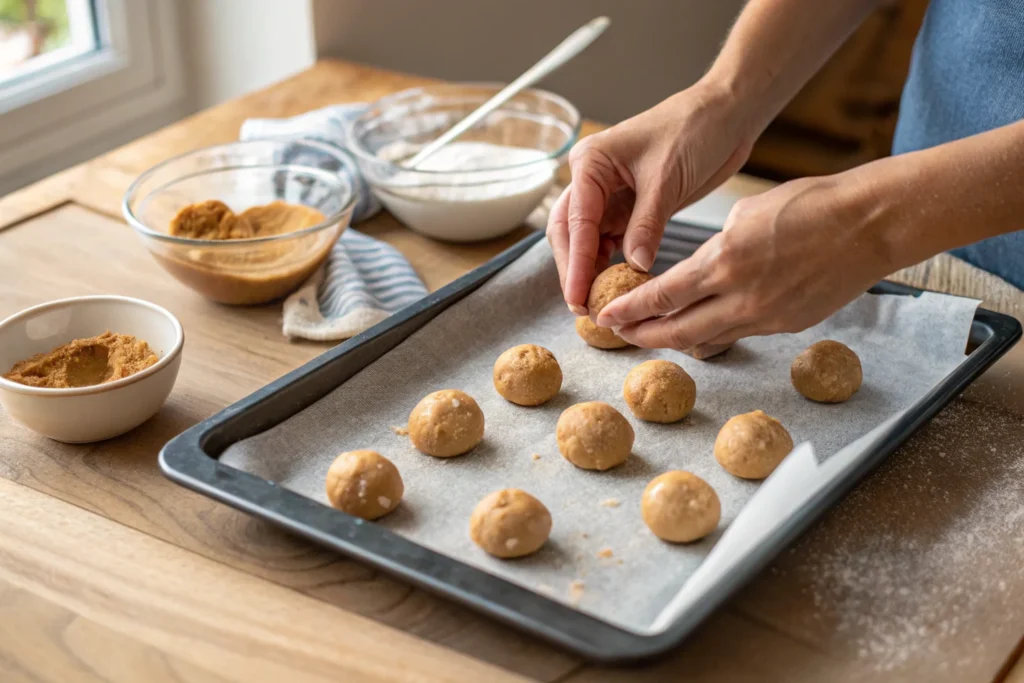
Shaping the Balls
Now for the fun part—rolling! Grab a small cookie scoop or a spoon to portion out the mixture. Aim for about 1-inch balls (about the size of a walnut) for the perfect bite-sized treat.
Roll each portion between your palms until smooth and round. If the mixture starts to stick to your hands, lightly dust your palms with powdered sugar. Arrange the balls on a parchment-lined baking sheet, leaving a bit of space between them.
Chilling for Firmness
This step is crucial, so don’t skip it! Pop the tray of rolled peanut butter balls into the refrigerator for at least 30 minutes. Chilling helps the balls firm up, making them easier to coat in chocolate later.
If you’re in a hurry, you can place the tray in the freezer for about 15 minutes instead. Just don’t skip this step, or you’ll end up with a messy dipping process (and nobody wants that!).
Coating with Chocolate
Once the peanut butter balls are firm, it’s time to coat them in chocolate. Start by melting 2 cups of semi-sweet chocolate chips with 1 tablespoon of coconut oil (optional, but it gives the chocolate a smoother finish) in a microwave-safe bowl. Heat in 30-second intervals, stirring in between, until the chocolate is fully melted and glossy.
Using a fork or dipping tool, lower each chilled peanut butter ball into the melted chocolate, ensuring it’s completely coated. Gently tap the fork on the edge of the bowl to remove excess chocolate, then place the coated ball back on the parchment paper.
Pro Tip: If you want to get fancy, drizzle a bit of white chocolate on top after the coating sets!
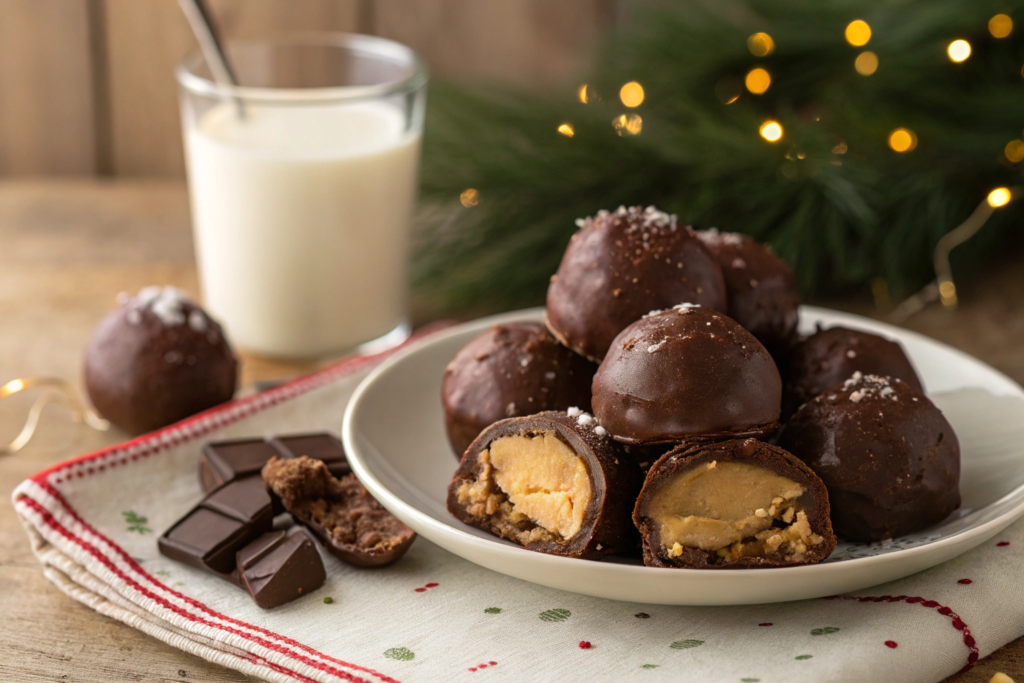
Setting and Storing
Let the chocolate-covered peanut butter balls sit at room temperature for about 20-30 minutes to set. If you’re short on time, place them back in the fridge for 10 minutes to speed things up.
Once the chocolate is fully hardened, transfer the peanut butter balls to an airtight container. They’ll stay fresh for up to 2 weeks in the fridge or 3 months in the freezer. Just make sure to let them come to room temperature before serving for the best flavor.
Troubleshooting Common Issues
Even with a simple recipe, things can sometimes go sideways. Don’t worry—I’ve got you covered with solutions for the most common peanut butter ball problems.
Why Are My Peanut Butter Balls Too Soft?
Soft peanut butter balls that don’t hold their shape can be super frustrating. This usually happens because the ingredient ratios are off. Here are some common culprits and how to fix them:
- Too Much Peanut Butter: If the peanut butter-to-sugar ratio is too high, the mixture won’t firm up properly. Try adding more powdered sugar, a tablespoon at a time, until the mixture is thick and easy to roll.
- Using Natural Peanut Butter: Natural or oily peanut butter (the kind you have to stir) can make the dough too soft. Opt for a no-stir, creamy peanut butter for better results.
- Skipped Chilling Time: Soft peanut butter balls often need extra time in the fridge. Chill the rolled balls for at least 30 minutes before dipping them in chocolate.
How to Fix Runny Peanut Butter Balls
A runny mixture is another common issue, especially if you’re eyeballing ingredients or using warm butter. Don’t toss it—here’s how to fix it:
- Add Dry Ingredients: The simplest solution is to add more powdered sugar or crushed rice cereal to soak up the excess moisture. Start with small amounts, mixing thoroughly after each addition, until the mixture holds its shape.
- Check Your Butter: If your butter was melted or too warm, it could have thrown off the balance. Next time, make sure your butter is softened, not melted.
- Cool Down the Mixture: If the mixture is warm from over-mixing, place it in the fridge for 10-15 minutes before trying to roll it into balls.
- Use Stabilizers: A tablespoon of graham cracker crumbs or crushed oats can help absorb extra moisture without affecting the taste.
Remember, peanut butter balls should be thick but pliable—think Play-Doh texture. Adjusting your mixture can help you get there.
Preventing Chocolate Coating Problems
Let’s face it, the chocolate coating can be the trickiest part. From clumps to cracks, here’s how to troubleshoot:
- Clumpy or Thick Chocolate:
- This usually happens if water gets into the chocolate while melting. Make sure your bowl and utensils are completely dry.
- Add 1 teaspoon of coconut oil or vegetable shortening to thin the chocolate and make it easier to work with.
- Cracked Coating:
- If the peanut butter balls are too cold when dipped, the chocolate may crack as it hardens. Let the balls sit at room temperature for 5 minutes after chilling before dipping them.
- Uneven Coating:
- Make sure the chocolate is fully melted and smooth before dipping. Stir it well and reheat for 10 seconds if it starts to cool down.
- Use a fork or dipping tool to ensure the ball is evenly coated. Tap the fork gently on the edge of the bowl to remove excess chocolate.
- Chocolate Sticking to the Surface:
- Line your tray with parchment or wax paper to prevent sticking. Avoid using foil, as it can leave tiny bits of metal on the chocolate.
By taking your time and following these tips, your chocolate coating will look smooth, glossy, and Instagram-worthy every time.
Customization and Variations
One of the best things about peanut butter balls? They’re super versatile! Whether you want to add some crunch, play with flavors, or make them fit your dietary needs, the options are endless. Let’s explore some fun ways to make these treats uniquely yours.
Adding Crunch with Mix-ins
If you’re all about texture, try mixing in some crunchy ingredients to elevate your peanut butter balls to the next level.
- Chopped Nuts: Add crushed peanuts, almonds, or pecans to the peanut butter mixture for a nutty crunch. Toast the nuts first for an extra burst of flavor!
- Shredded Coconut: Mix in unsweetened coconut flakes for a tropical twist. For a little sweetness, use sweetened coconut instead.
- Rice Cereal or Granola: A handful of crushed rice cereal or granola can add a satisfying crunch to every bite.
- Mini Chocolate Chips: Stir in mini chocolate chips for double the chocolatey goodness—perfect for true chocoholics!
Flavor Enhancements
Looking to change up the flavor profile? Here are a few easy ways to add extra depth and personality to your peanut butter balls:
- Vanilla Extract: A teaspoon of vanilla extract in the peanut butter mixture enhances the sweetness and adds a comforting flavor.
- Cinnamon or Nutmeg: Sprinkle in a pinch of ground cinnamon or nutmeg for a warm, cozy flavor. This works especially well for holiday batches.
- Sea Salt: A light sprinkle of flaky sea salt on top of the chocolate coating creates a sweet-and-salty masterpiece.
- Peppermint Extract: Swap out vanilla for peppermint extract to create a festive, minty twist—great for holiday gift boxes!
Experimenting with flavors can make every batch feel like a whole new treat.
Dietary Modifications
Got dietary restrictions? No problem—peanut butter balls are easy to adapt to fit a variety of needs.
- Gluten-Free: Make sure to use certified gluten-free ingredients, like gluten-free rice cereal.
- Low-Sugar: Replace powdered sugar with a powdered sugar substitute like Swerve or monk fruit sweetener for a lower-sugar option.
- Dairy-Free: Use vegan butter and dairy-free chocolate chips to make the recipe completely dairy-free.
- Nut-Free: Substitute sunflower seed butter or cookie butter for peanut butter to make them safe for nut allergies.
No matter the dietary need, you can tweak this recipe without sacrificing flavor or fun!
Frequently Asked Questions (FAQs
Still have questions about peanut butter balls? Let’s clear up some common concerns and curiosities so you can master these delightful treats.
How to Fix Runny Peanut Butter Balls Alltimecooking?
Runny peanut butter balls can be tricky to work with, but the solution is simple. Adjust the ratio of dry to wet ingredients by gradually adding more powdered sugar. Start with a tablespoon at a time, mixing thoroughly after each addition, until the mixture becomes thick and easy to shape. If you want extra texture, crushed rice cereal or graham cracker crumbs can also help absorb excess moisture.
Why Are My Peanut Butter Balls Alltimecooking Too Soft?
Soft peanut butter balls often result from using natural peanut butter with a higher oil content. Unlike stabilized peanut butter, natural varieties don’t provide the same structure. To fix this, switch to a creamy, no-stir peanut butter for future batches. If you’ve already made the mixture, try chilling it longer—30 minutes to an hour in the fridge usually does the trick.
What Are Butter Balls?
Butter balls are a different type of confectionery, often made with a blend of butter, sugar, and nuts. Unlike peanut butter balls, these treats don’t typically include peanut butter or chocolate. Butter balls are especially popular during the holidays and are known for their rich, buttery flavor and crumbly texture.
Why Is Peanut Butter Called Pindakaas?
In Dutch, “pindakaas” translates to “peanut cheese.” The name originated because the term “butter” was protected by law and could only be used for actual dairy butter. To work around this, manufacturers labeled the product “peanut cheese,” even though it contains no cheese.
Conclusion
Peanut butter balls are the perfect blend of simplicity, versatility, and deliciousness. With just a handful of ingredients and a few easy steps, you can create a treat that’s loved by kids and adults alike. Whether you’re making them for the holidays, gifting them to friends, or just treating yourself, these no-bake bites are guaranteed to impress.
We’ve covered everything you need to know to make the perfect peanut butter balls—from selecting the best ingredients and tools to troubleshooting common issues like runny mixtures or cracked chocolate coatings. Plus, with options for customization, you can make them uniquely yours by adding crunch, experimenting with flavors, or tailoring the recipe to fit dietary needs.
The best part? They’re beginner-friendly, so you don’t need to be a pro to nail this recipe. Once you’ve mastered the basics, the possibilities are endless!
So, what are you waiting for? Grab some peanut butter, melt that chocolate, and start rolling your way to a batch of irresistible treats. Don’t forget to share your creations with family, friends, and even your social media followers—because let’s be real, who wouldn’t want to see these beauties?